Save card
Learn how to enable save card functionality for later use.
You can provide your mobile app users with the ability to save their card information securely for future use. This allows users to choose a preferred payment method, reducing their need to enter card information repeatedly. This is a nice-to-have, but optional feature for your app.
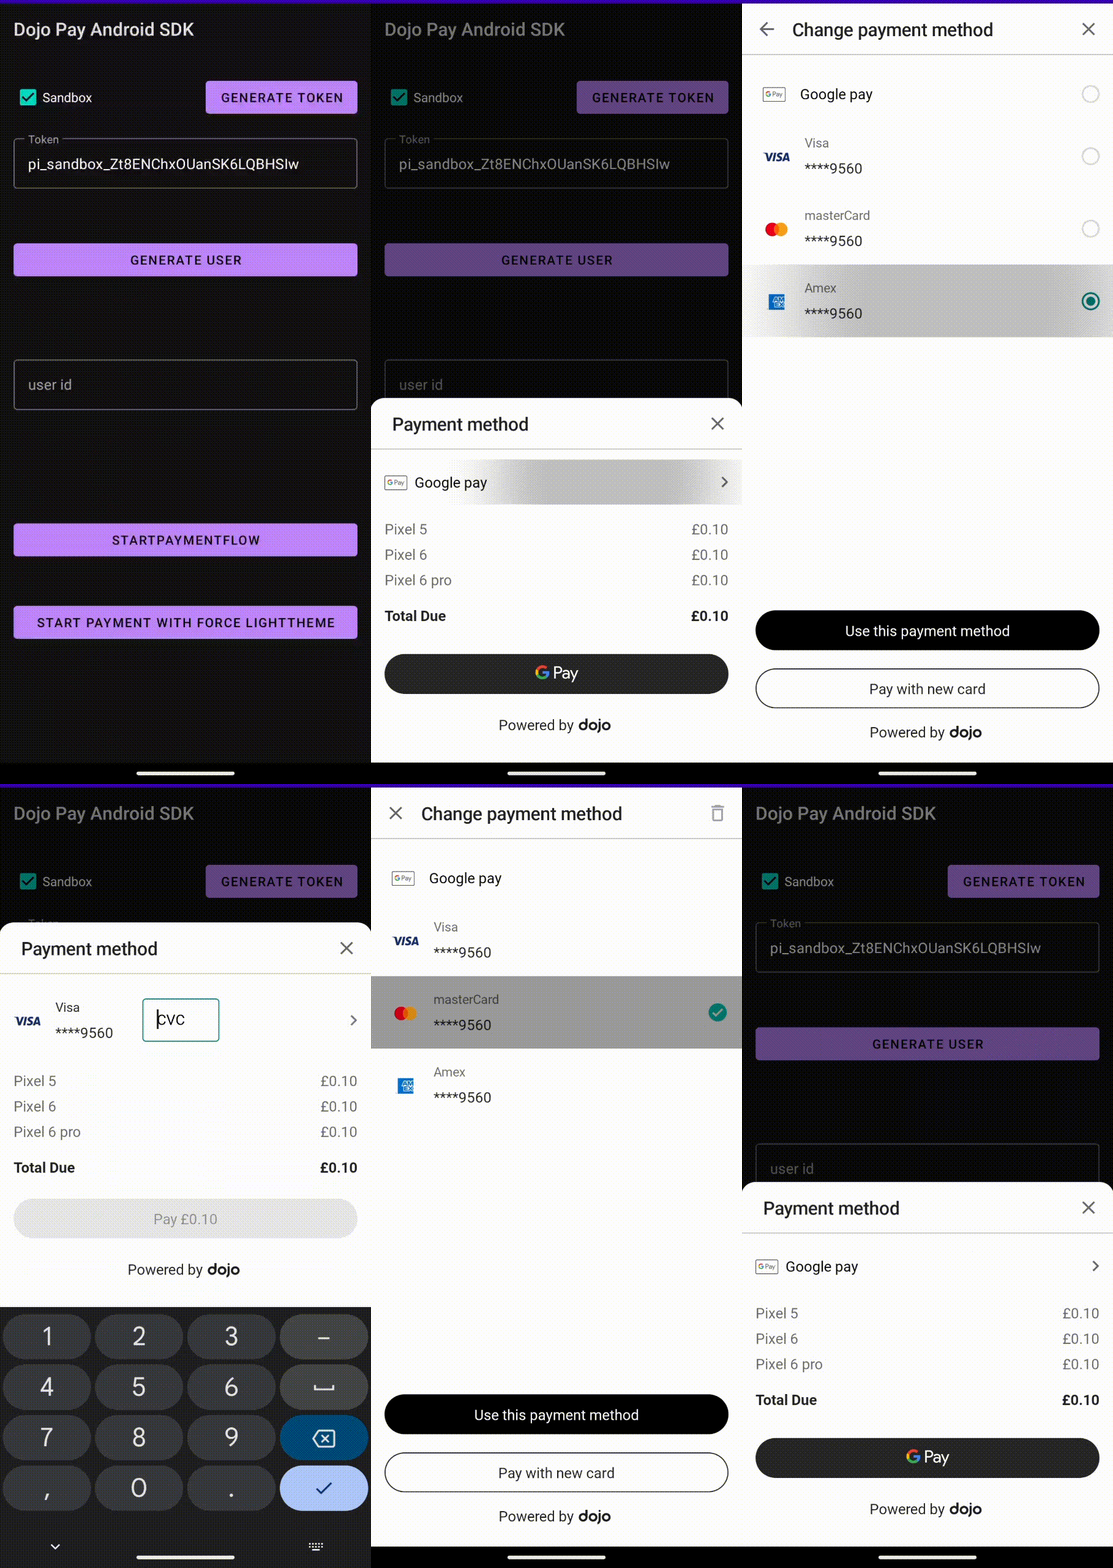
The following gif is a demonstration of this feature in a mobile app.

Enabling save card
To enable save card functionality in your app, do the following:
- Dojo understands that each app is built differently. The steps listed serve as a good reference to build this feature into your app.
userandcustomermight be used interchangeably in this guide except forcustomerAPI endpoints.


Step 1: Ensure you have a customer ID
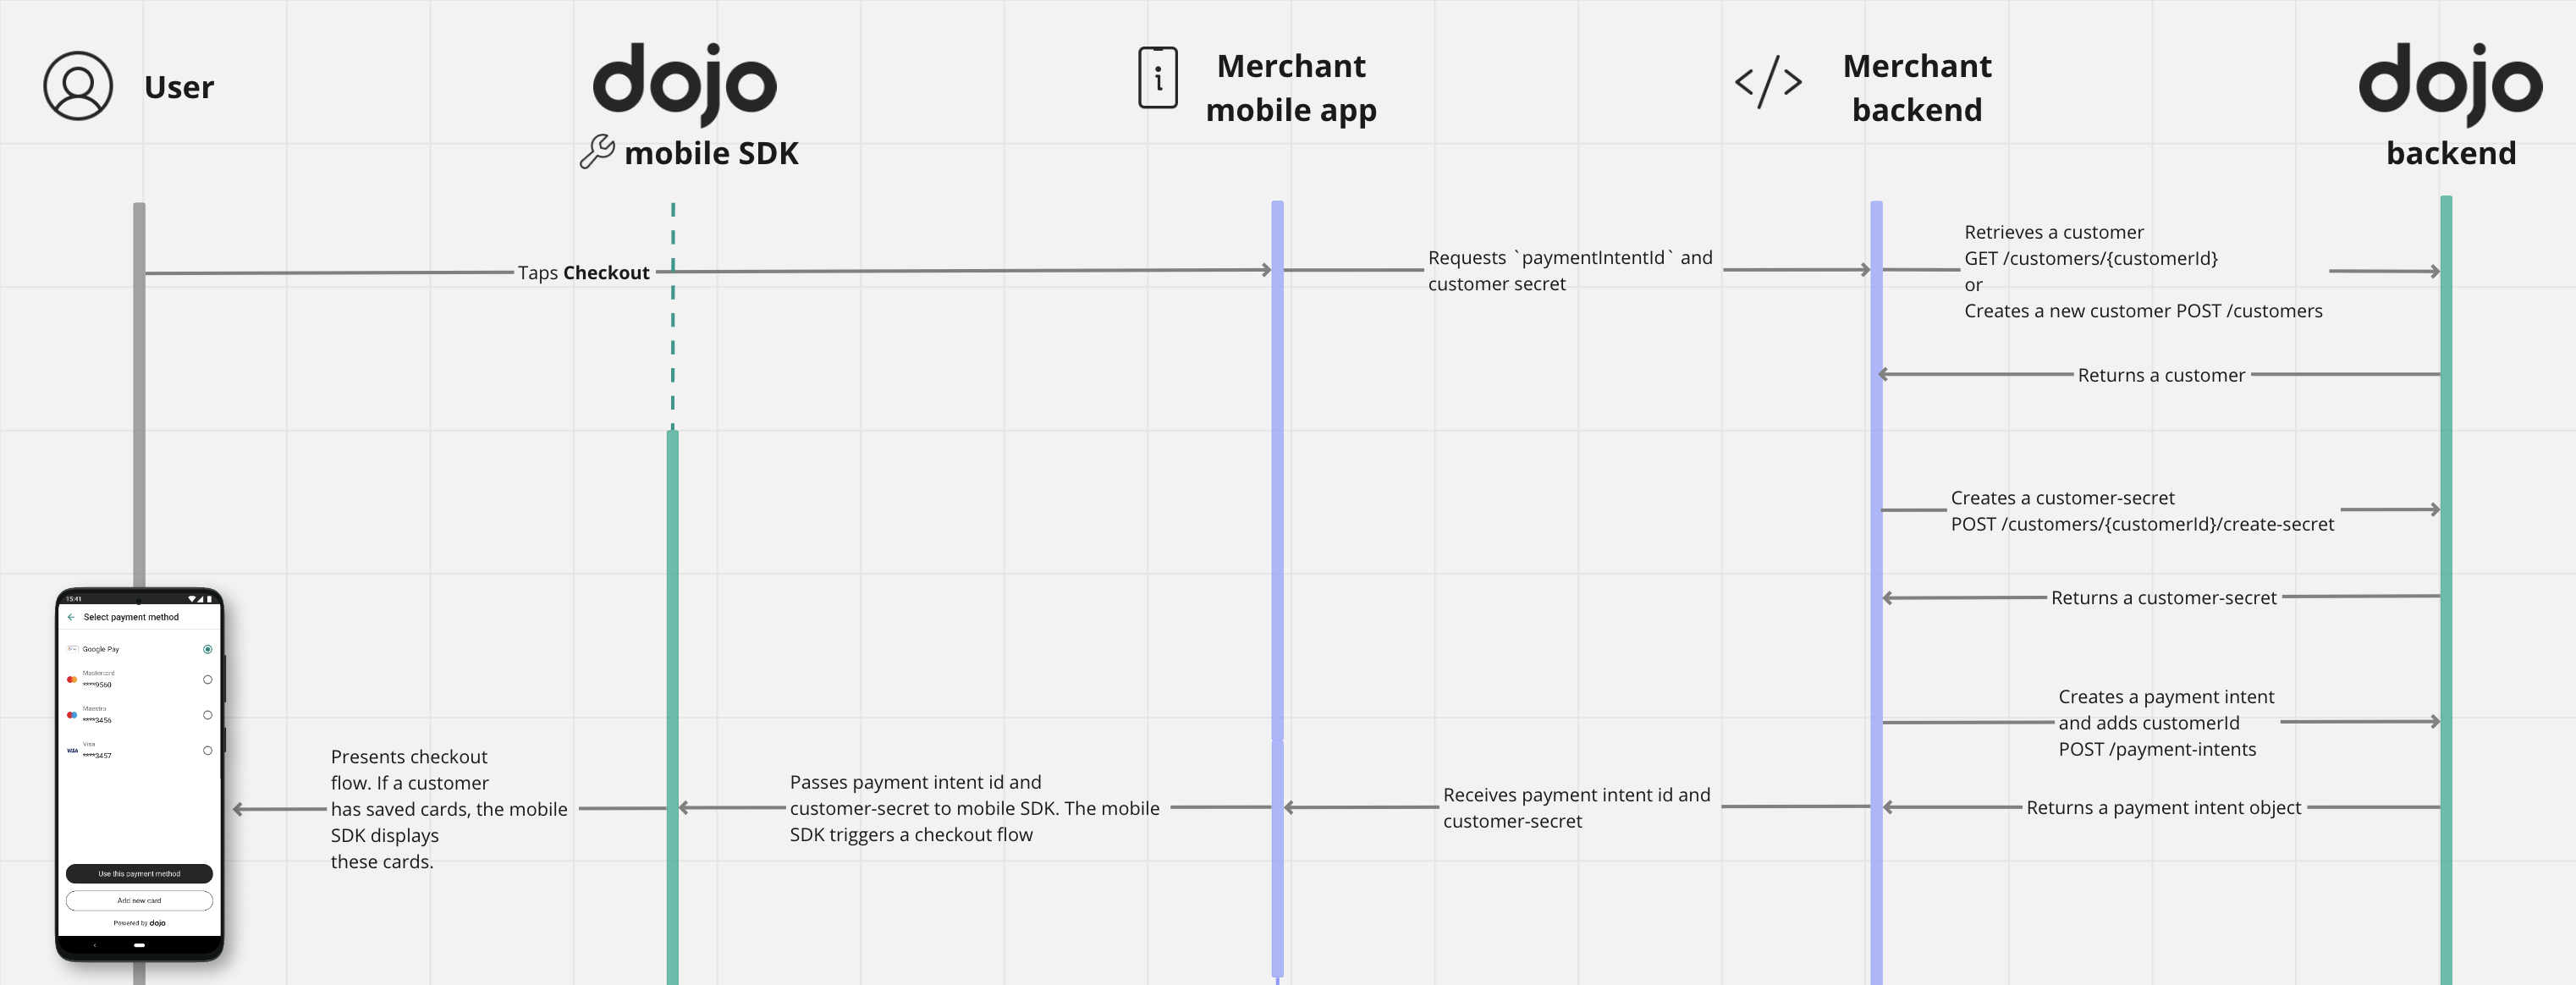
- If you don’t have a Dojo user to link to your backend user, create a new one using POST /customers.
- If you already have a
customerId, retrieve it.
- Don't create a new customer for each transaction. This avoids customers from accessing their saved cards.
Step 2: Authorize your app to retrieve customer’s saved cards
For mobile SDK to retrieve information about saved cards for a specific user, you must create and pass a customer secret using POST /customers/{customerId}/create-secret.
- To create a customer
secret, ensure you have acustomerIdfrom step 1 and, your API Key. - You must always create a customer
secretin your backend and then pass it to your app. - Never store sensitive data such as API Keys inside your app.
- Customer
secretis short-lived, hence Dojo recommends creating a new one each time your app might need to access stored payment methods.
The following code samples demonstrate how to create a customer secret.
- Python
- cURL
- PowerShell
- C#
- PHP
loading...
loading...
loading...
loading...
loading...
Step 3: Create a payment intent linked to the customerId
When creating a payment intent, pass the customerId to the payment intent request body.
"customer": {
  "customerId": "cust_sandbox_9WibJ2zeMU2C9gkRnDgs1g"
}
Step 4: Initiate payment flow in the app
Pass the paymentIntentId and customer secret to your app. Then, pass them to the SDK to start the checkout process.
- Kotlin
- Java
loading...
loading...
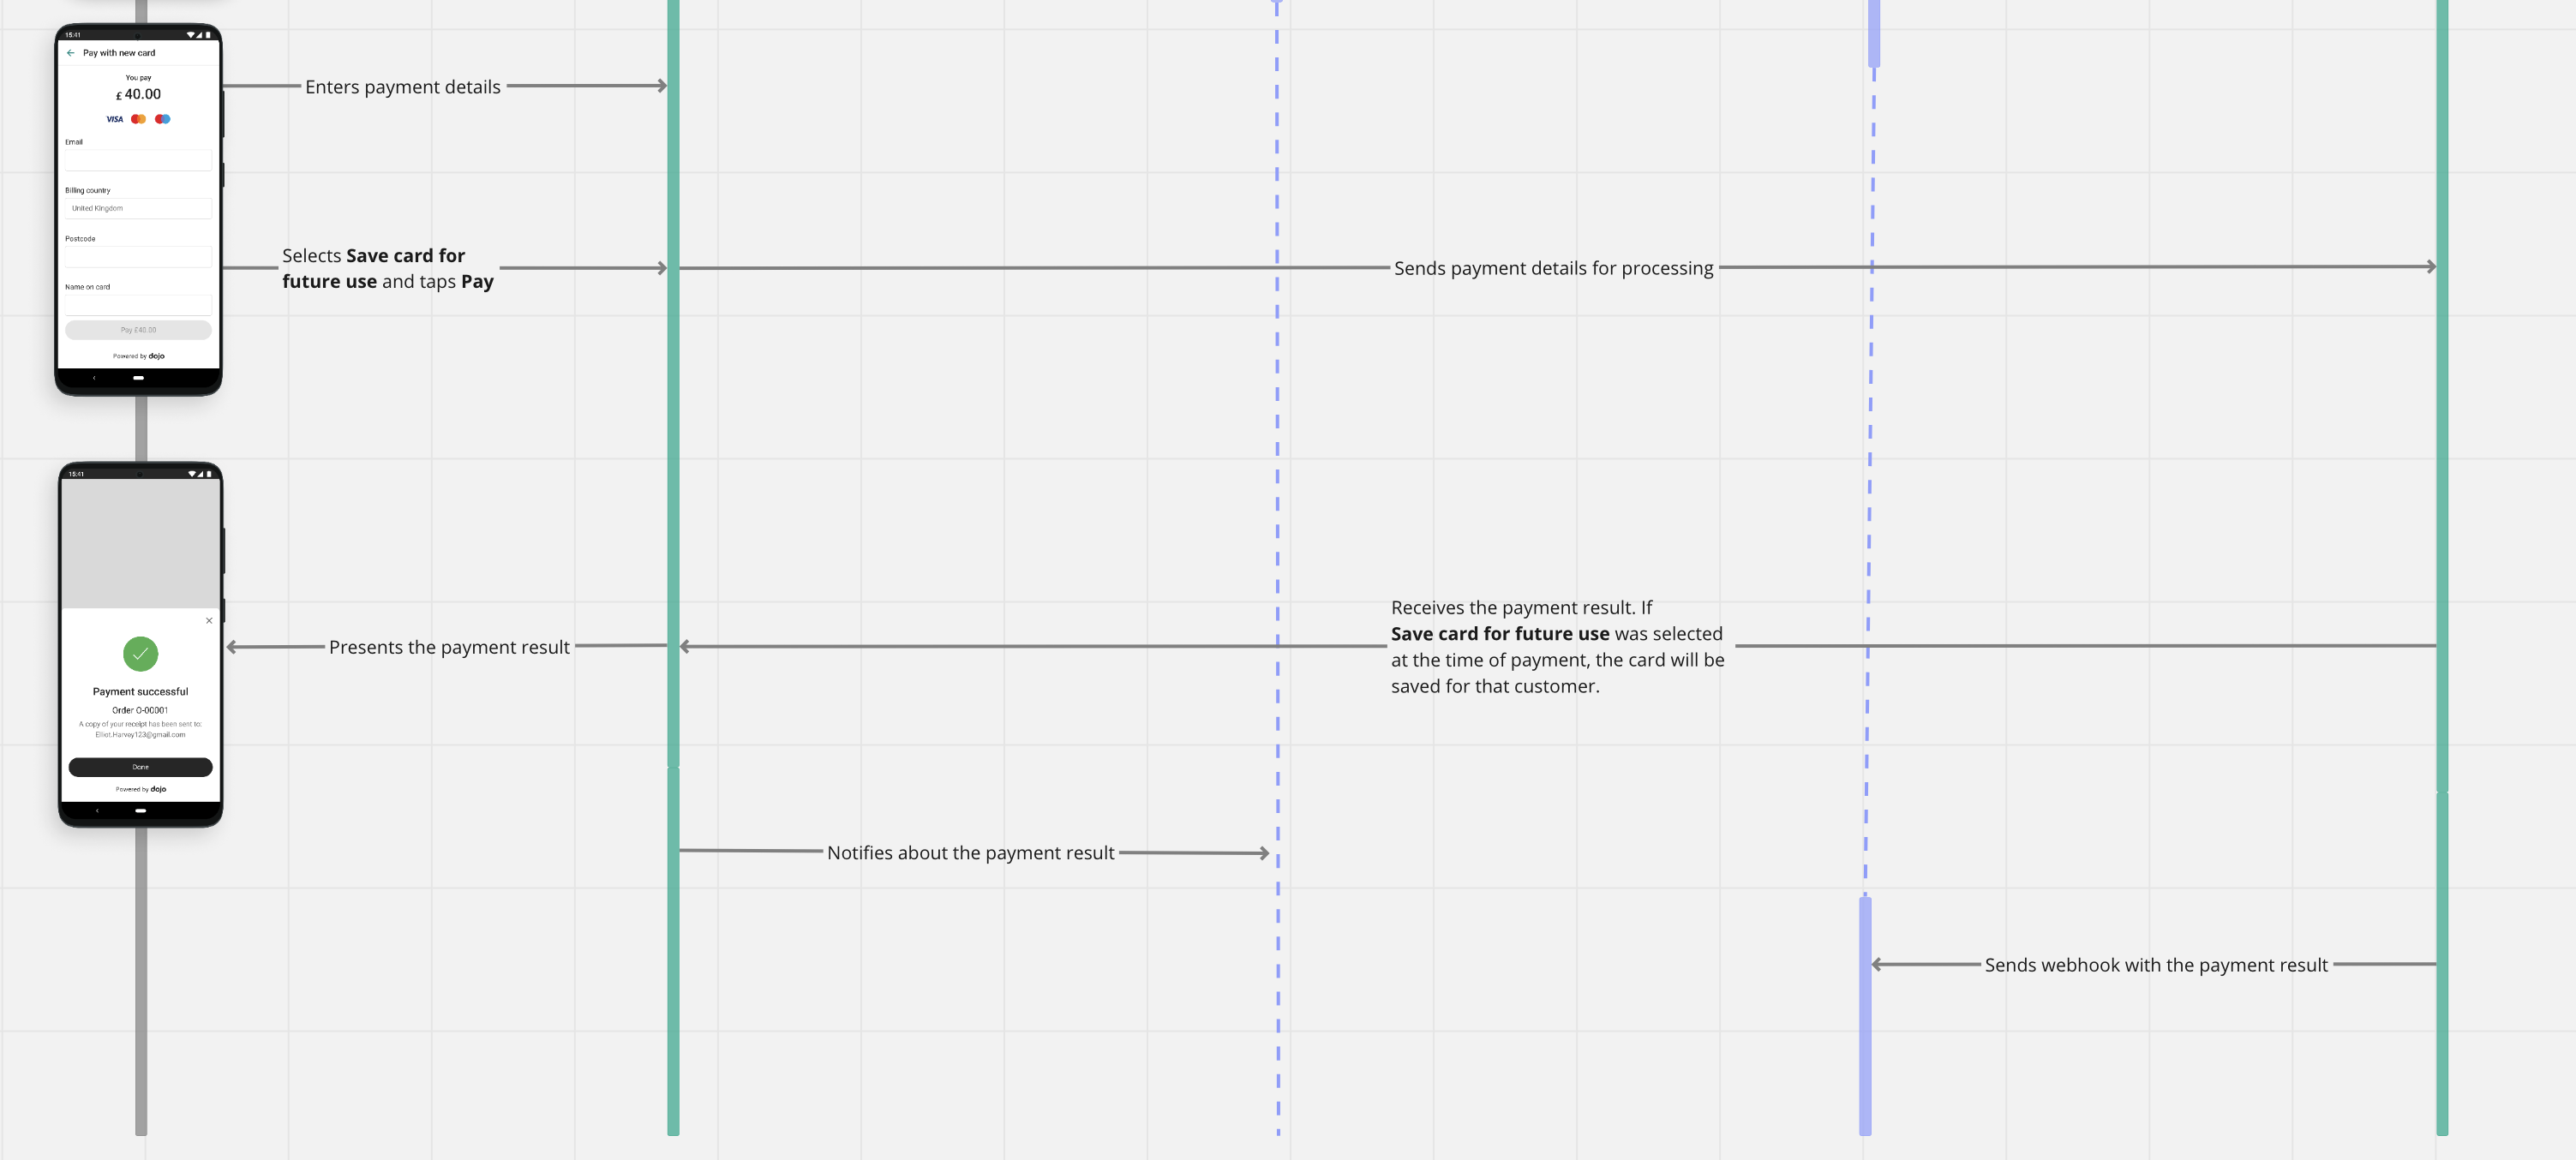
Step 5: Receive payment status
Once payment is completed, the app receives a notification with a numerical code representing the result. Visit the status codes reference for more information about what each code means. Additionally, your backend will receive a notification via Webhook.