Configure
Learn how to configure and enable the Dojo for WooCommerce plugin.
After you have enabled the Dojo checkout method, do the following to begin setting up the plugin in your WooCommerce ecosystem:
-
In the WooCommerce plugin, go to Settings > Payments.
-
Under Payment Methods, click Finish set up in the Dojo checkout method.

This takes you to Dojo checkout settings where you can configure the plugin.
How to configure the plugin
To configure the Dojo for WooCommerce plugin, do the following:
Step 1: Create an API key
After installing the plugin, you need to create an API key from the developer portal.
Step 2: Use your API key
- Copy the API key that you created.
- In the WooCommerce plugin page, go to Settings > Payments.
- In the Dojo checkout method, click Manage. This takes you to the Payments > Dojo checkout page.
- Under Gateway settings, in the Secret API key field, paste the API key.
- Click the Save changes button.
Ensure that you use the production API key.
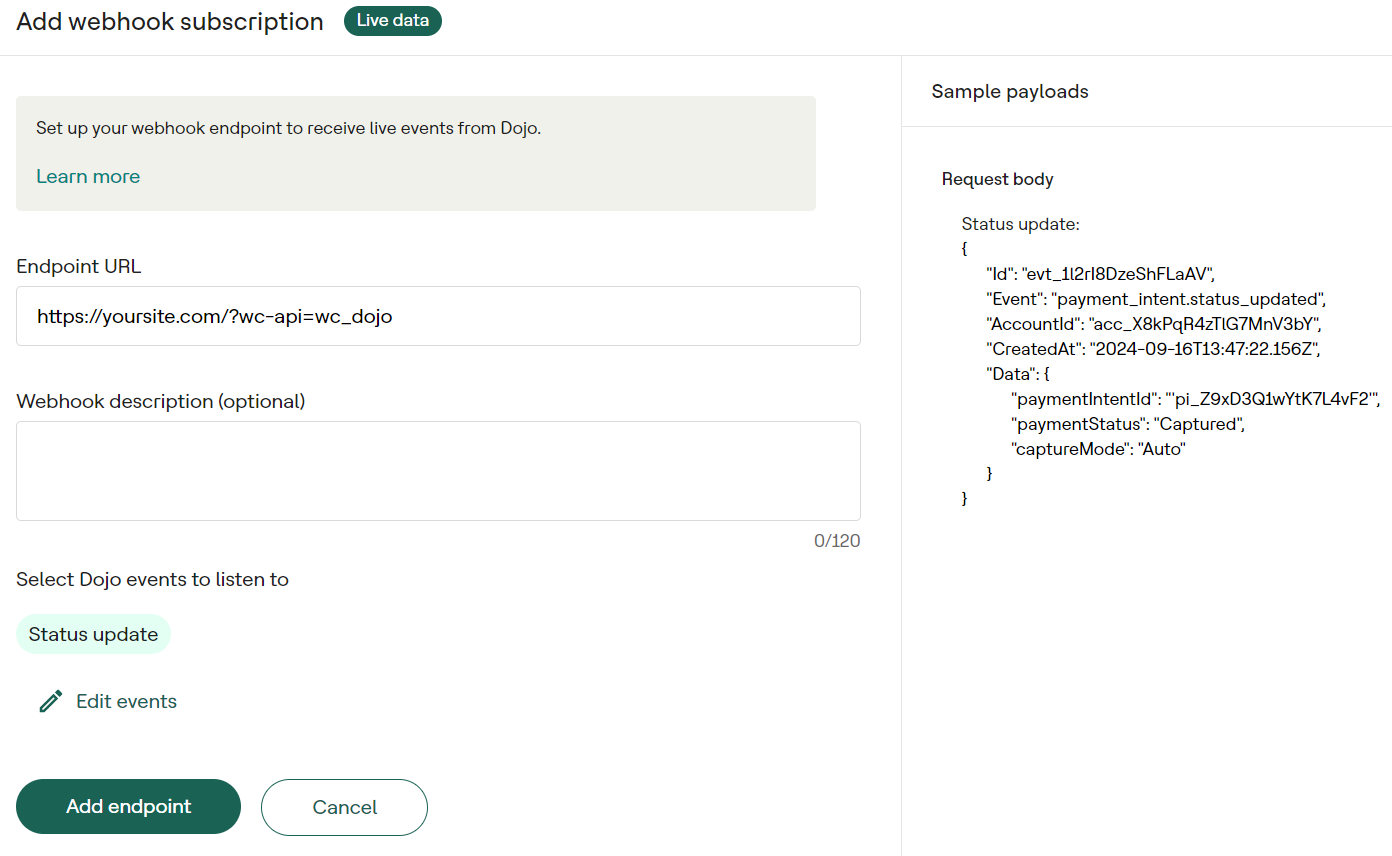
Step 3: Add a webhook endpoint
- In the Developer portal, go to Webhooks and click the Add endpoint button.
- Enter the endpoint URL.
This is your WordPress public URL followed by /?wc-api=wc_dojo. For example, https://yoursite.com/?wc-api=wc_dojo.
- Click Select events under Select Dojo events to listen to.
- Select Status update event. This displays the payment intent status.
You must select only Status update event. The rest of the events aren't needed.
- Click the Add events button.
- Click the Add endpoint button.
Step 4: Use your webhook endpoint
-
In the webhooks page of the Developer portal, click the key under Secret value of your URL. This copies the secret value key to your clipboard.
-
In the WooCommerce plugin page, go to Settings > Payments > Dojo checkout.
-
Under Webhook settings, in the Webhook secret field, paste the key you copied.

-
Click the Save changes button.
You are now all set to accept payments using Dojo checkout for your ecommerce transactions.