Developer Portal
Find out more about the Dojo Developer Portal and how you can self serve integration set-up and configuration.
The Dojo Developer Portal is your central dashboard for managing API credentials, configuring webhooks and monitoring device integrations.
The developer portal also contains legacy keys for the Connect API integration. We strongly recommend upgrading to the Dojo API as new integrations to the Connect API are no longer supported.
Login to Dojo Developer Portal
To get started using the Dojo Developer Portal, you'll first need a Dojo account. If you don't have an account, sign up now or speak to your partnership manager.
Environment Management
You can toggle between environments using the sidebar switch on the left-hand side:
-
Sandbox (Test mode) — Use this for development. It utilizes mocked data to ensure your integration is stable before going live.
-
Production (Live mode) — Use this to process real transactions and access live account data.
Account structure
Dojo uses a two-tier structure:
- Company Account: Your primary business entity.
- Location Accounts: Unique sub-accounts (e.g., individual storefronts).
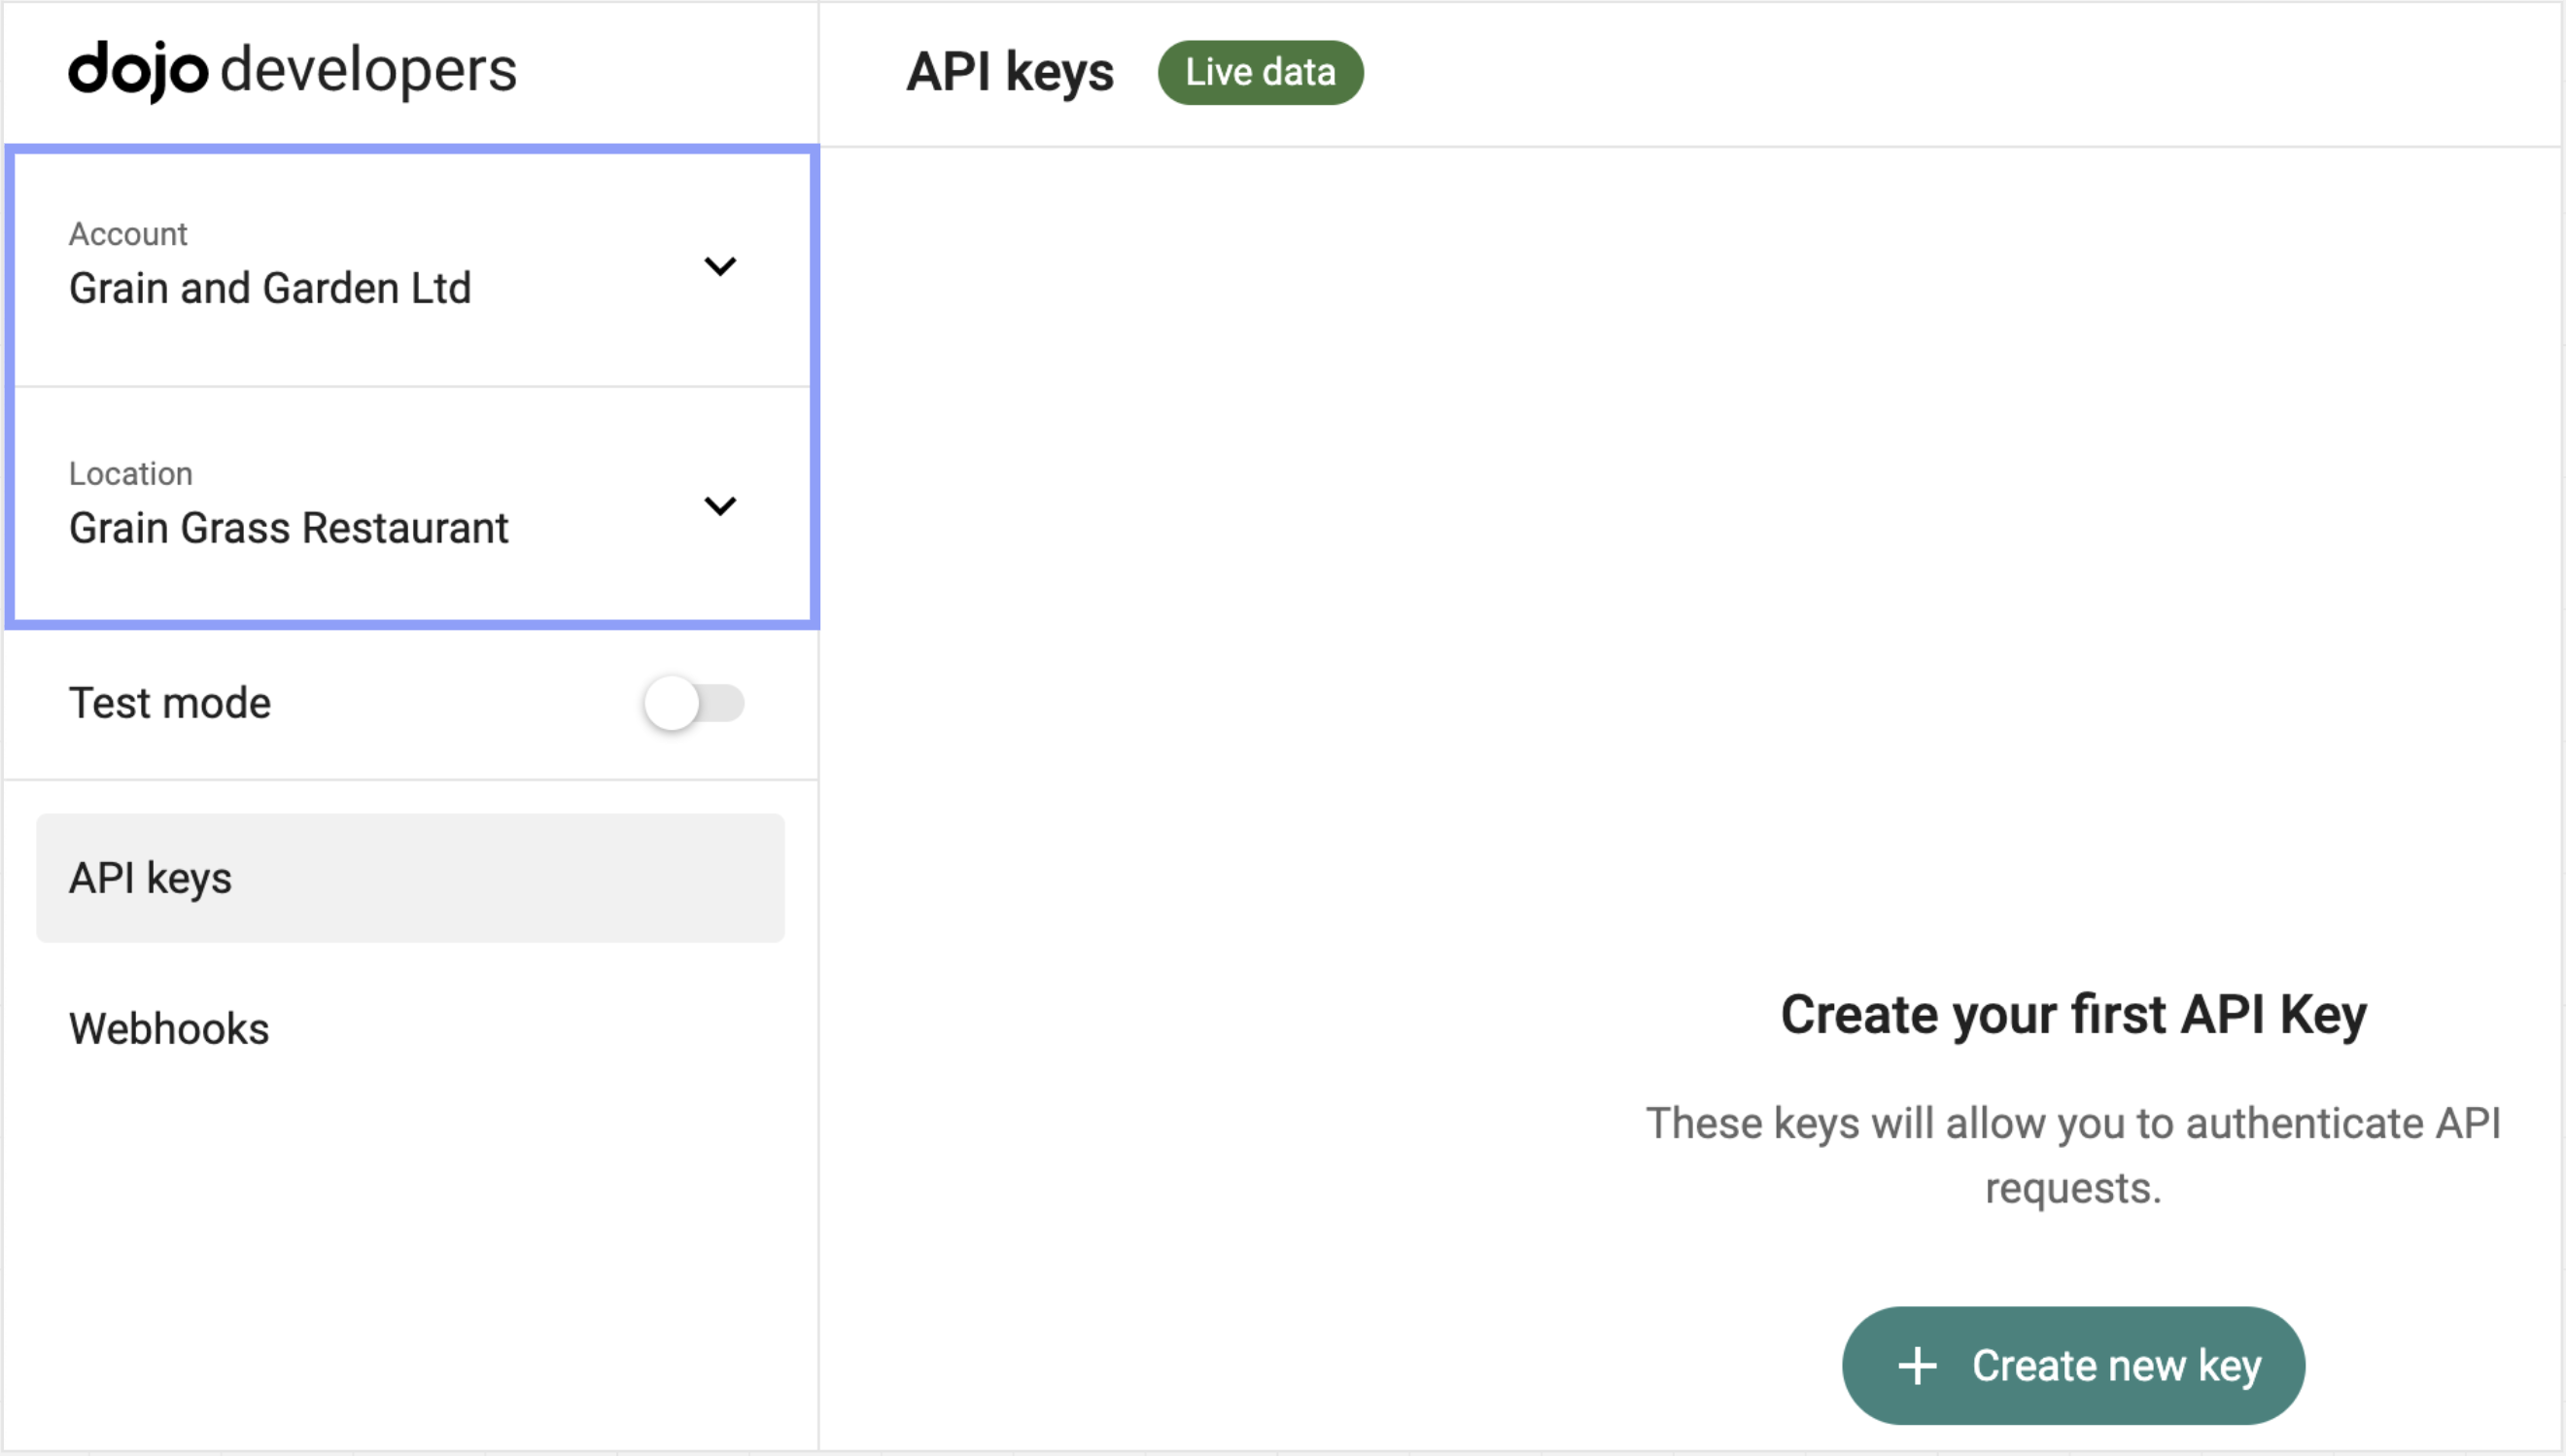
Each Location Account maintains its own set of API Keys for both Sandbox and Production. To view a specific location's data or keys, use the drop-down selector in the top-left corner.
API keys
You can create or manage API keys in the Developer Portal. If your company account has different location accounts, make sure you have selected the correct one.
Upon your first login to the Developer Portal, an "Initial API Key" will be available for immediate use. This key is pre-configured with access to the Dojo API for the products approved on your account, allowing you to make API requests without manual setup.
If you want to use Online Checkout, go to the Developer Portal, select Account activation from the sidebar, and follow the instructions on the page. More information here.
To generate your API keys, go to Developer Portal > API keys and select + Create new key. To copy the API key, click on it.
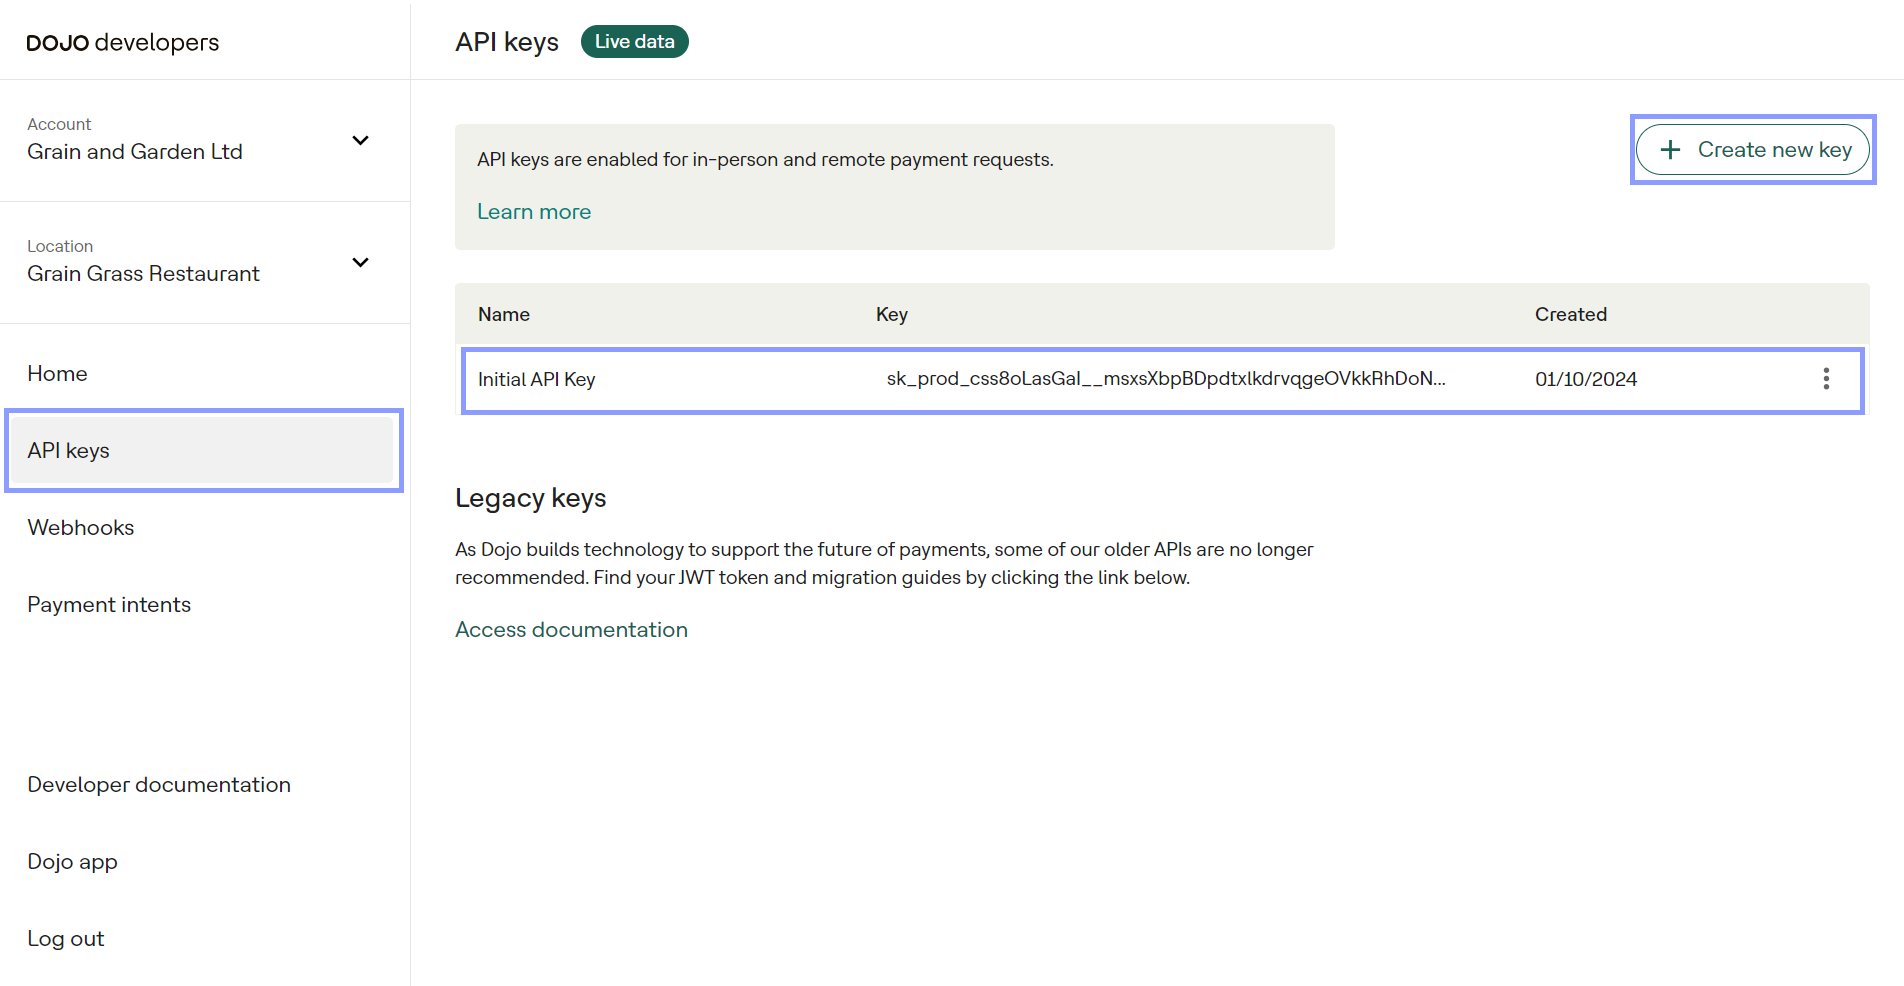
Store your API key securely in your system, as you would store any other password. If your API key is compromised, you need to generate a new one and replace a compromised key. Don't forget to delete a compromised key after all.
Webhooks
You can manage webhooks in the Developer Portal using the following instructions. You also can manage webhooks directly using our API.
Create a new webhook
-
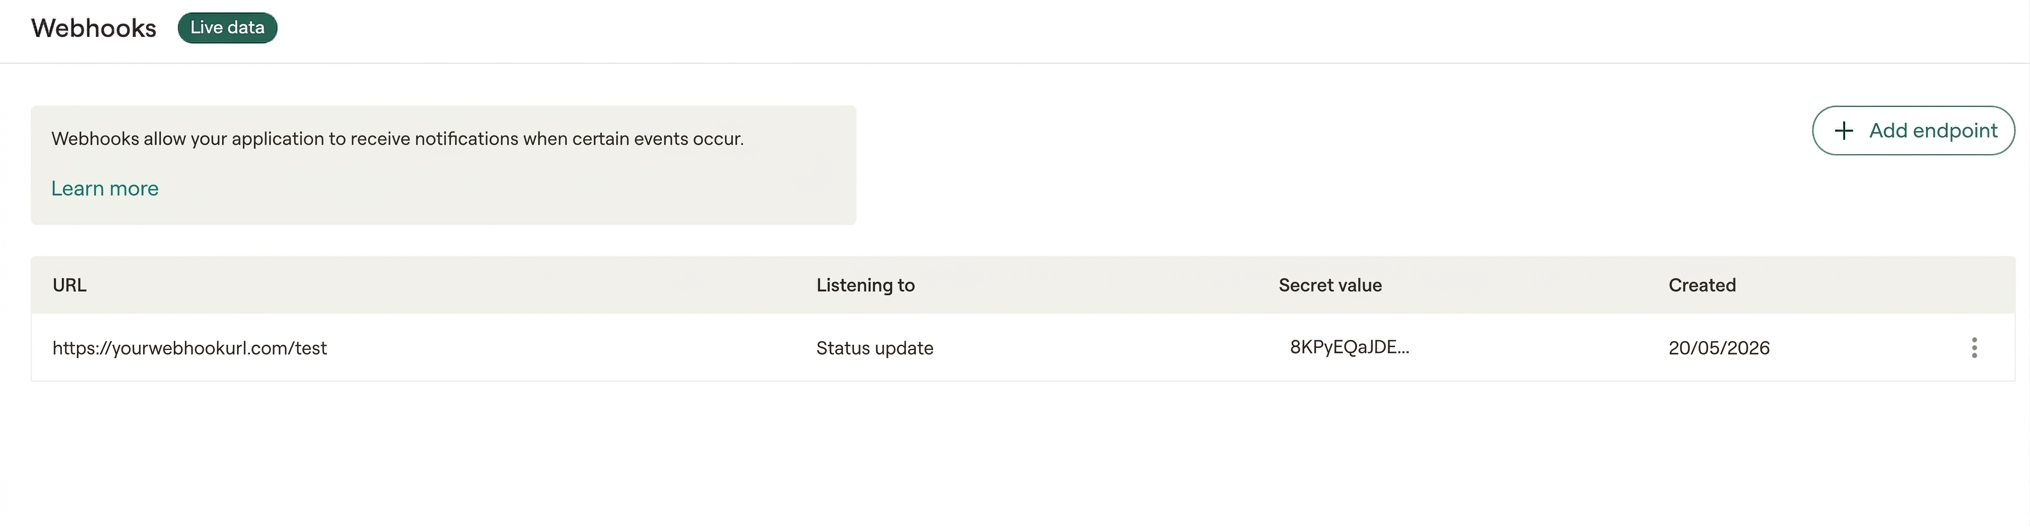
Go to Developer Portal > Webhooks and select +Add endpoint.
-
Enter your endpoint URL and select the events you want to subscribe to. We recommend status updates at a minimum.
-
Click Add endpoint.
Edit, or delete an existing webhook
To edit or delete a webhook, click the three dots next to it and select the relevant option.
Device information
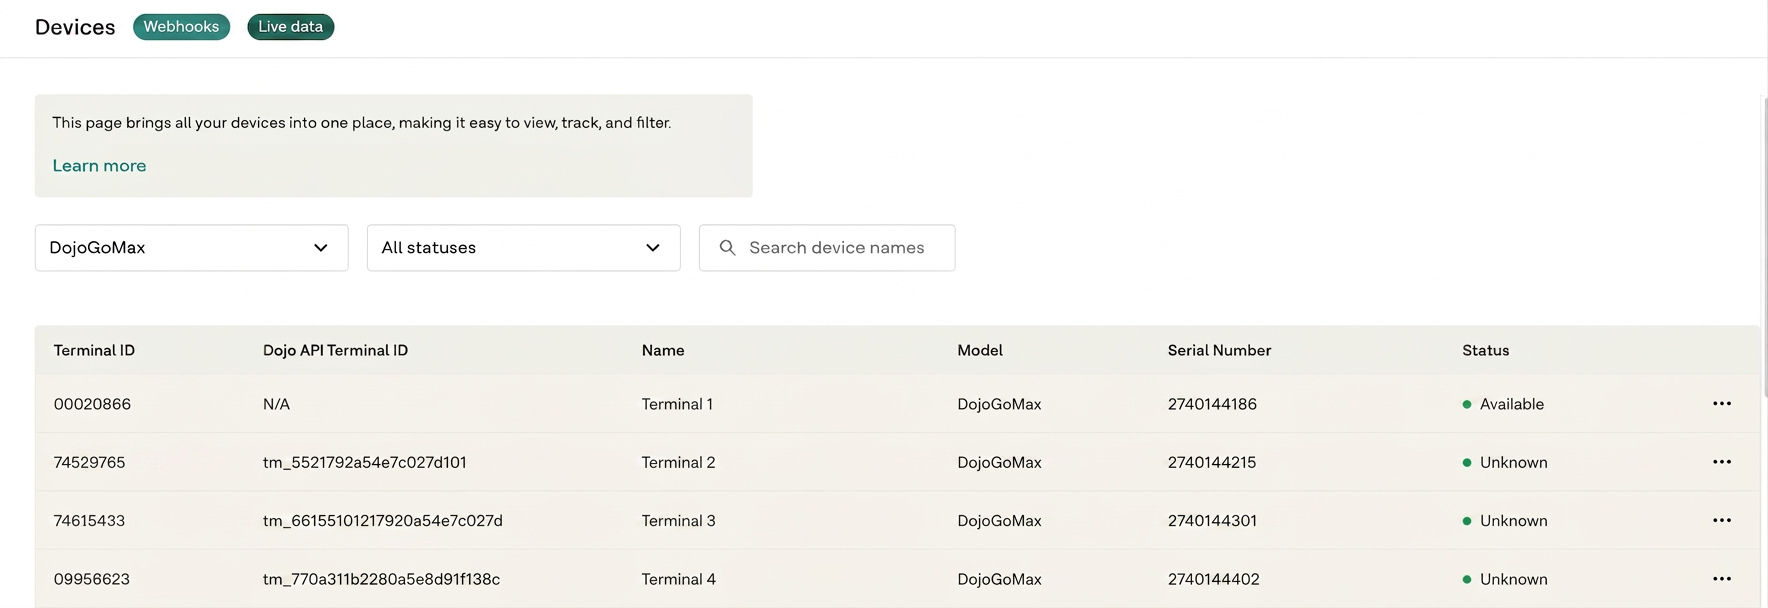
This section provides key information about your Dojo devices. You can use these details to manage and integrate with your devices programmatically via the Dojo API. By clicking onto the terminal, you can see additional information and config options such as:
- Terminal ID - This is the unique identifier for the terminal that you will use to make requests to the Dojo API. It is required to initiate a terminal session and interact with the device.
- Model - Displays the hardware model of the device. This can be useful for tailoring your application's behavior to the specific capabilities of each device model.
- Status - Indicates the current state of the device. Lets you know whether the device is online or not.
- Activation code - A one-time code used for the initial setup and activation of a new Dojo device.
- Integration settings - This toggle allows you to enable or disable the API integration for each individual device. This is useful for troubleshooting or for staging rollouts of your integration.
Payment Intents
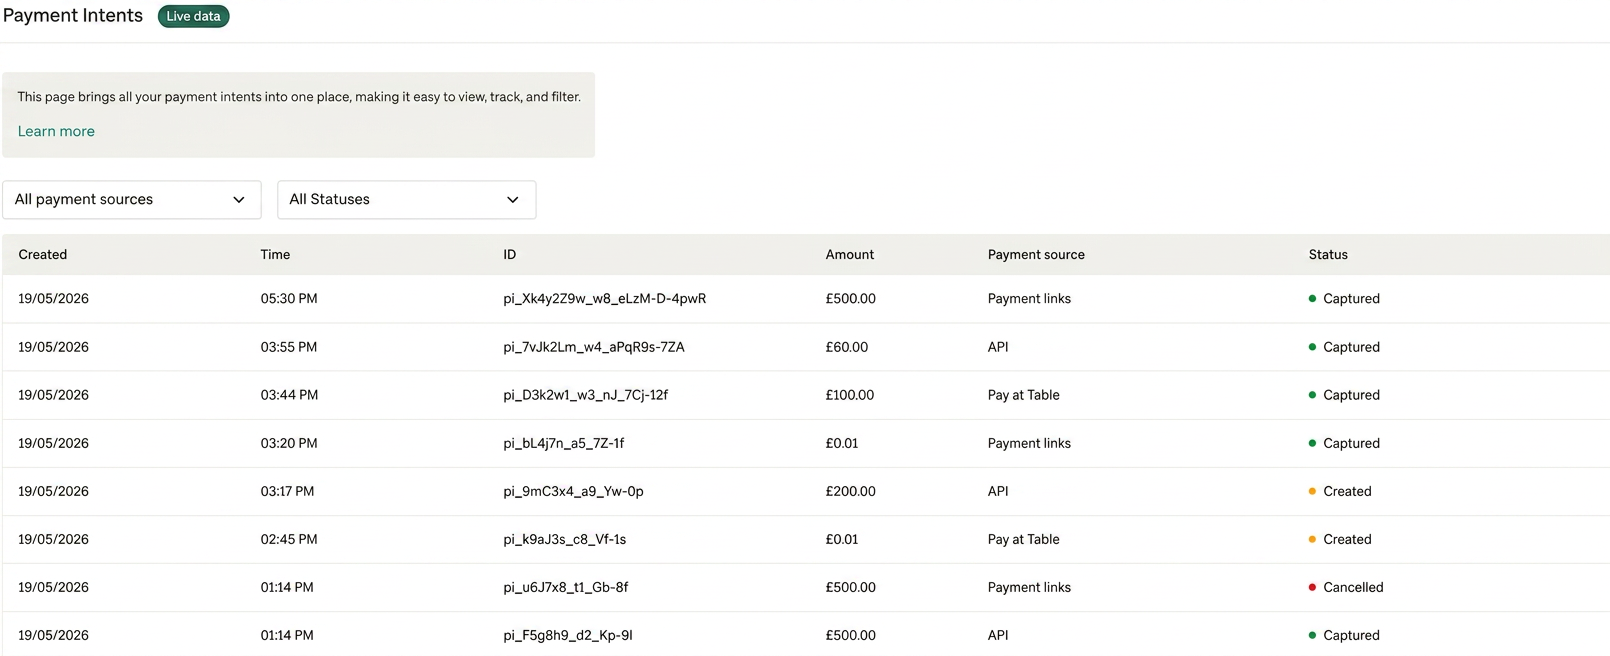
Bringing all of your payment intents into one place, making it easy to view, track, and filter.
- Created - The date which the Payment intent was created.
- Time - The time which the Payment intent was created.
- ID - The Payment Intent ID .
- Amount - The Amount held in the Payment Intent ready to be captured, or, the amount captured if in the captured status.
- Payment Source - How the Payment intent was generated
- Status - Current status of the Payment Intent, this can be Created, Authorized, Captured, Cancelled. The Payment intent is designed to be re-used, so will not update to declined.
 Set up notification webhooks Use WebHooks to receive updates related to your payments.
 Generate API keys Learn how to manage your API keys.