Step-by-step guide
Step-by-step guide to set up your own virtual terminal.
Setup flow
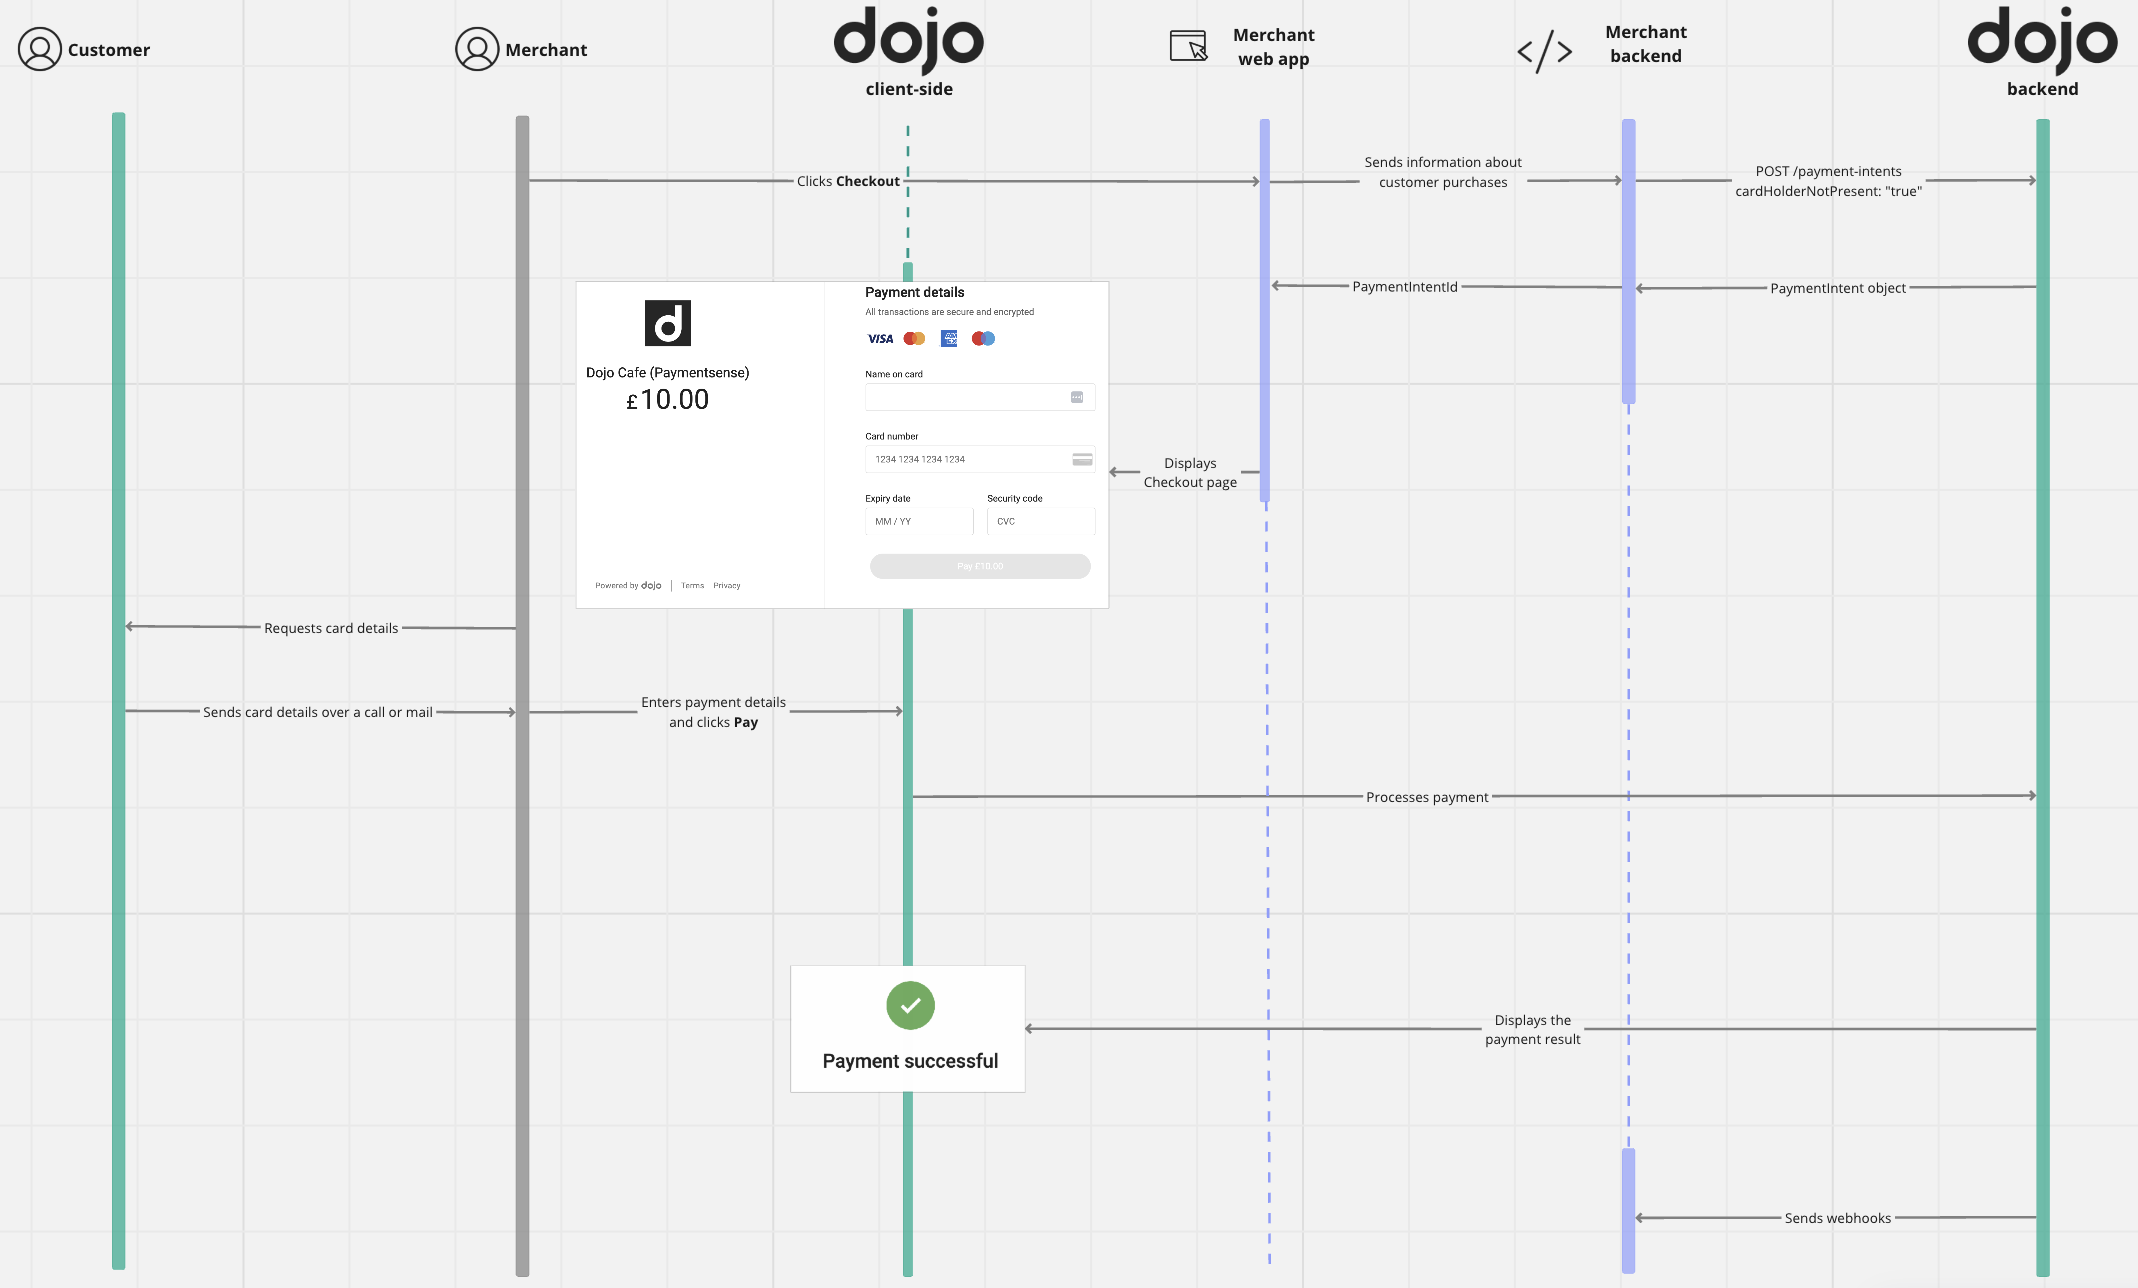
To set up a virtual terminal for your web app, do the following:
- This guide assumes that you are setting up your virtual terminal using Dojo’s prebuilt checkout page. Similarly, you can set up a virtual terminal with components and mobile integration.

Step 1. Create a payment intent
To create a payment intent, call a server-side endpoint. For that, the following parameters are required:
amount: This includes the currency and value, in minor units, for example, "1000" for 10.00 GBP.reference: Your unique reference for the payment intent.cardHolderNotPresent: "true": Confirms that the card holder is not present during the transaction.
- When
cardHolderNotPresentis set totrue, it means payments are made through the mail or over the telephone. They are a common use case for virtual terminals. - To process these transactions, you must have a virtual terminal to accept payments over the phone, fax, email, or by mail. This type of transaction is common for businesses that operate remotely or have a significant online presence.
- Using
cardHolderNotPresent, you can implement a virtual terminal in components and Mobile integration.
Here's an example of how to create a virtual terminal payment for 10 GBP:
- Python
- C#
- cURL
- PowerShell
loading...
loading...
loading...
loading...
Step 2. Redirect to Dojo Checkout Page
- After receiving the request, Dojo creates a payment intent and returns its unique ID:
{
    "id": "pi_sandbox_RBMHTJ4fIkmSppDILZVCGw",
    ...
}
- Return this
idto the client-side and use it to create a link in the following format:
https://pay.dojo.tech/checkout/{{id}}
- Share the link with your merchant. Clicking this link will render the checkout page at the merchant's end.
Do not share this link with your customer. This link is for the merchant use only.
Step 3. Request card details from the customer
Next, the merchant requests card details from the customer over a call, email, or mail order. When the customer authorizes the merchant to make the payment, the merchant fills in the customer's card details on the checkout page. Dojo processes the payment and redirects to the success page. Finally, the customer is notified via email about the successful payment.
Step 4. Handle post-payment events
After a user completes a payment, we recommend using webhooks to update the backend result and receive information about the payment. Set up endpoints to receive and handle webhook requests. By using webhooks, your application can receive updates about payment events and you can ensure that you don't lose any information about the payment. To handle these events, configure your backend for incoming webhook notifications and process these notifications accordingly.
Dojo's backend sends a payment_intent.status_updated event when the payment is completed (captured, refunded, reversed, canceled).
To set up webhooks, review our webhooks guide.
Ensure you validate the transaction result by either using a webhook or making a direct API call on your backend. The result code received on the application front-end might not be reliable as you might receive delayed responses.
Here's an example of how to subscribe to the payment_intent.status_updated event:
- cURL
- PowerShell
- Python
- C#
- PHP
loading...
loading...
loading...
loading...
loading...
Step 5. Test and go live
Before going live, test your integration using the test card numbers:
| Card Name | Card number | Expiry Date | CVV | 3D security | Status |
|---|---|---|---|---|---|
| No | Successful | ||||
| 2.0 | Successful | ||||
| No | Decline |
When you are ready to go live, switch your secret key to production one with the prefix sk_prod_.