Step-by-step guide
A quick example of a Terminals flow.
For ease of use, the request samples here will be cURL. The response samples are JSON. The language you use for your own integration may differ, and throughout Dojo's documentation there are code samples in PHP, cURL, Python, and other common languages and formats.
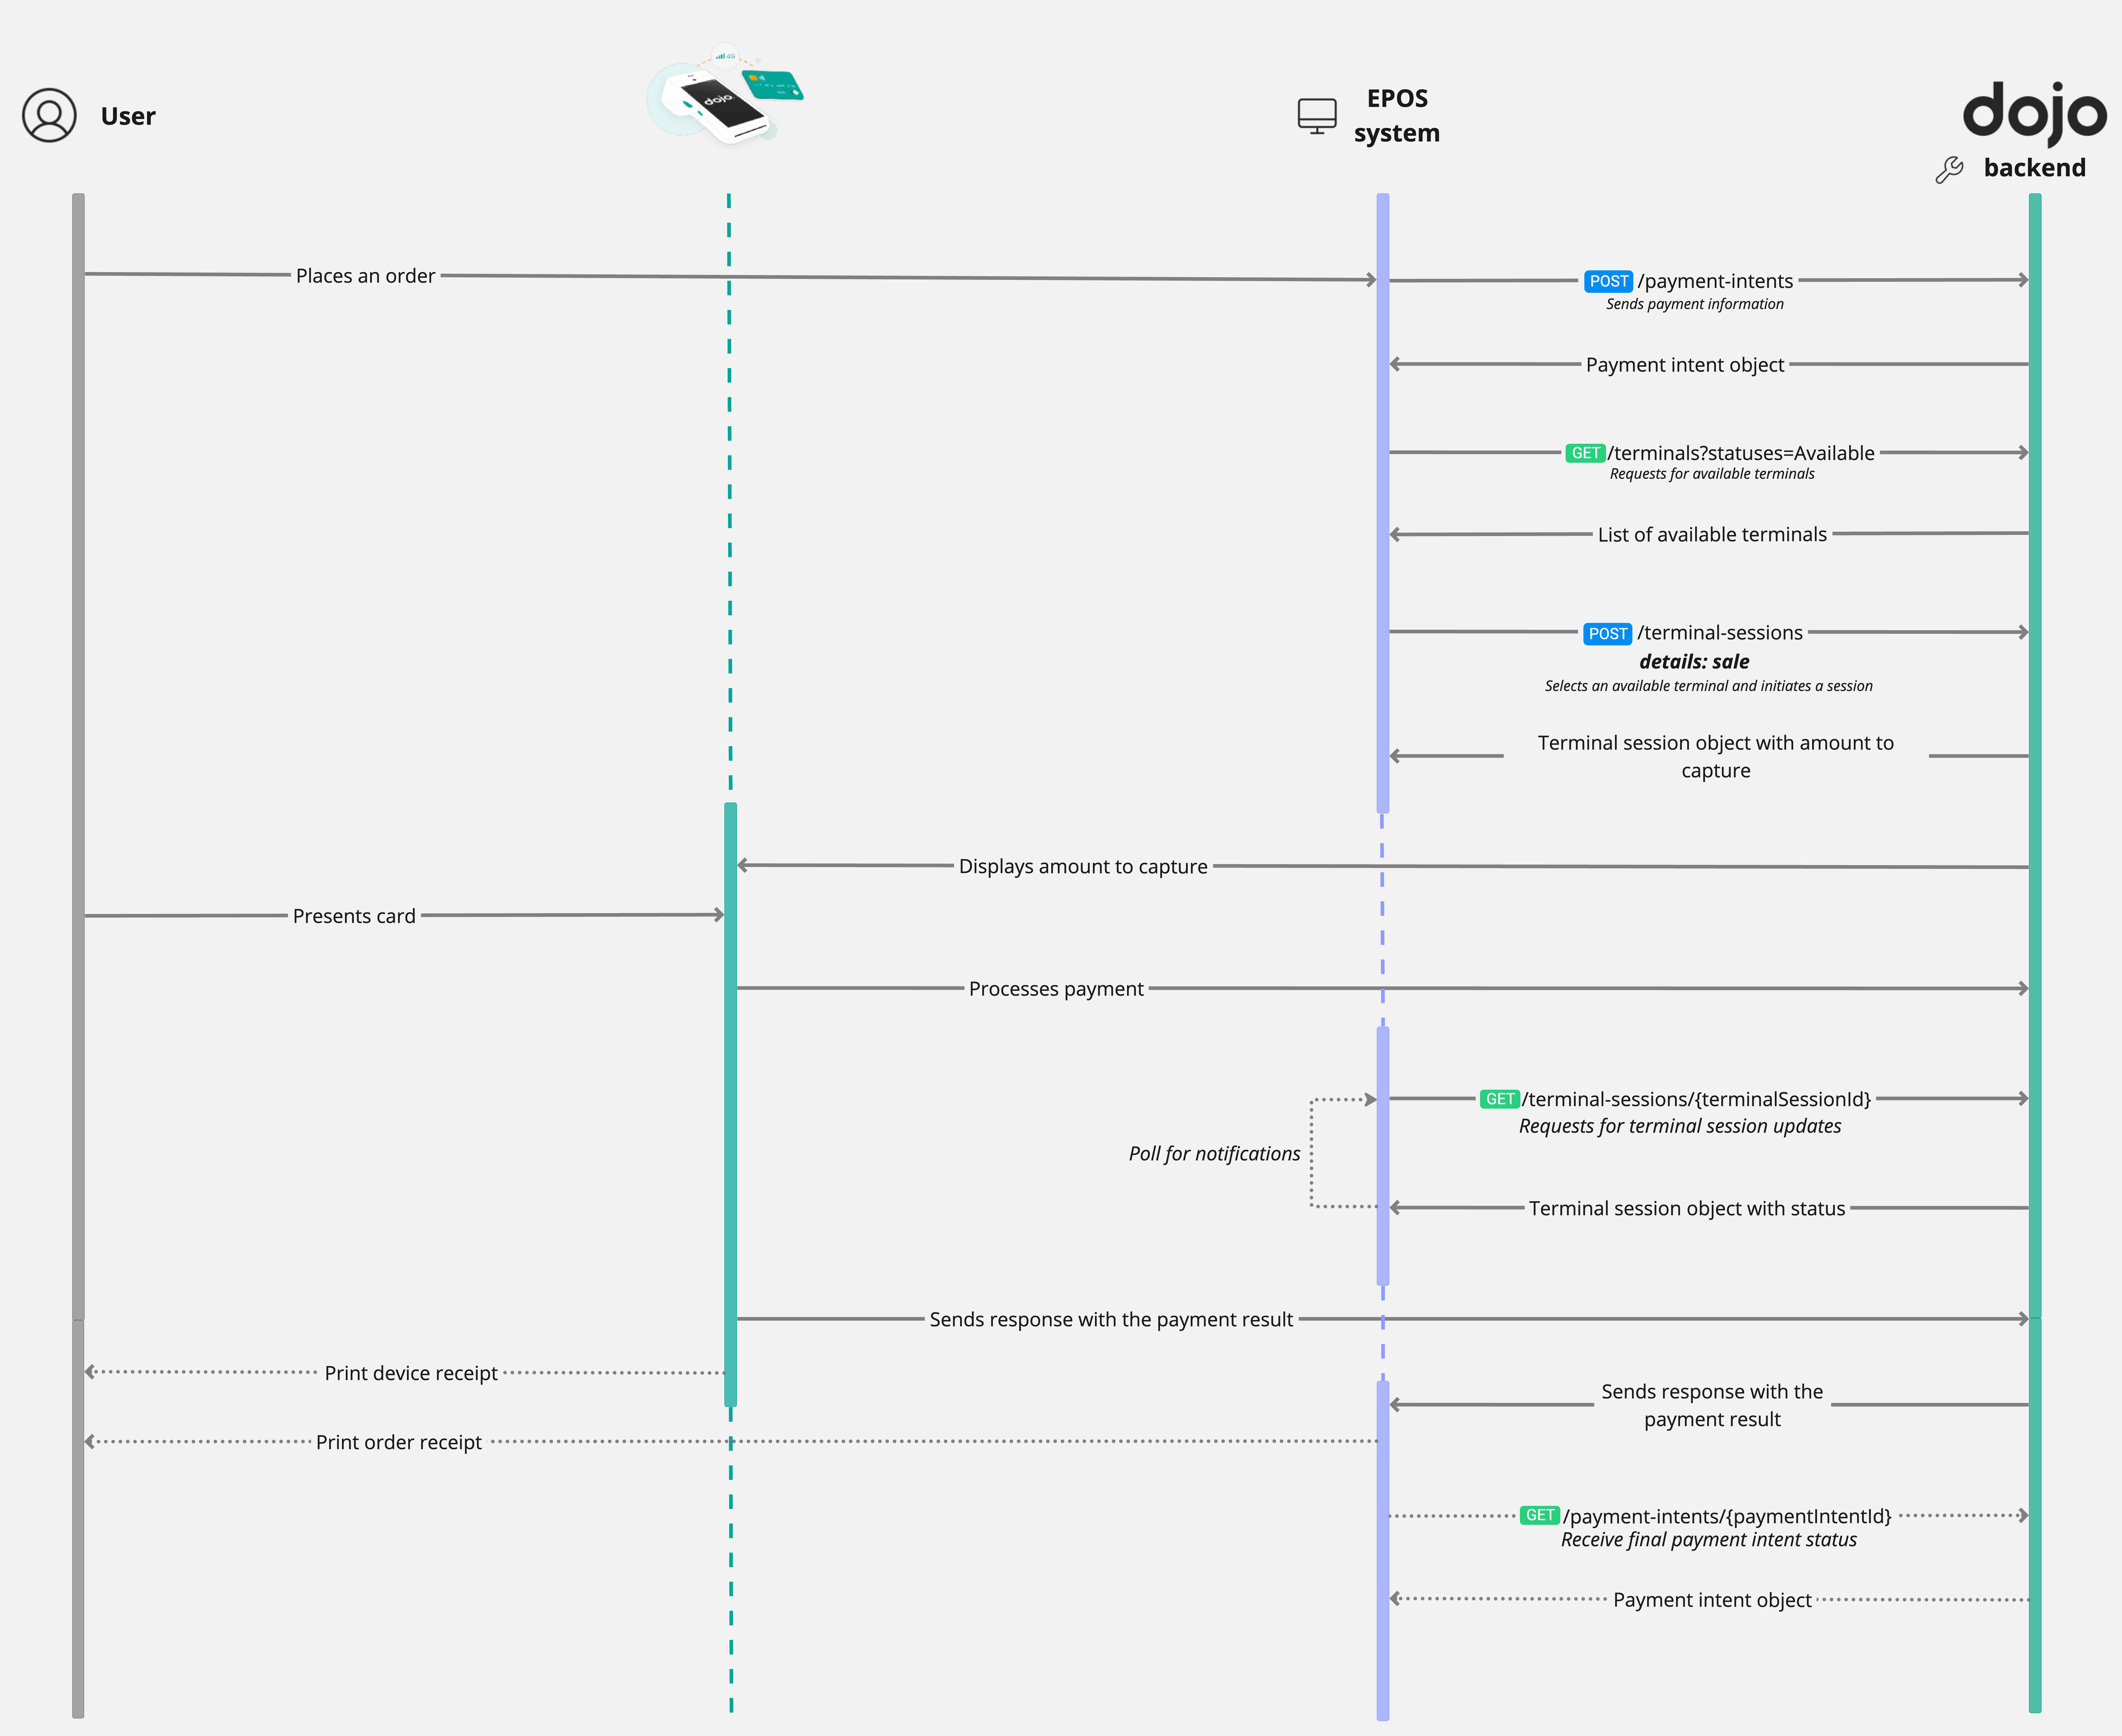
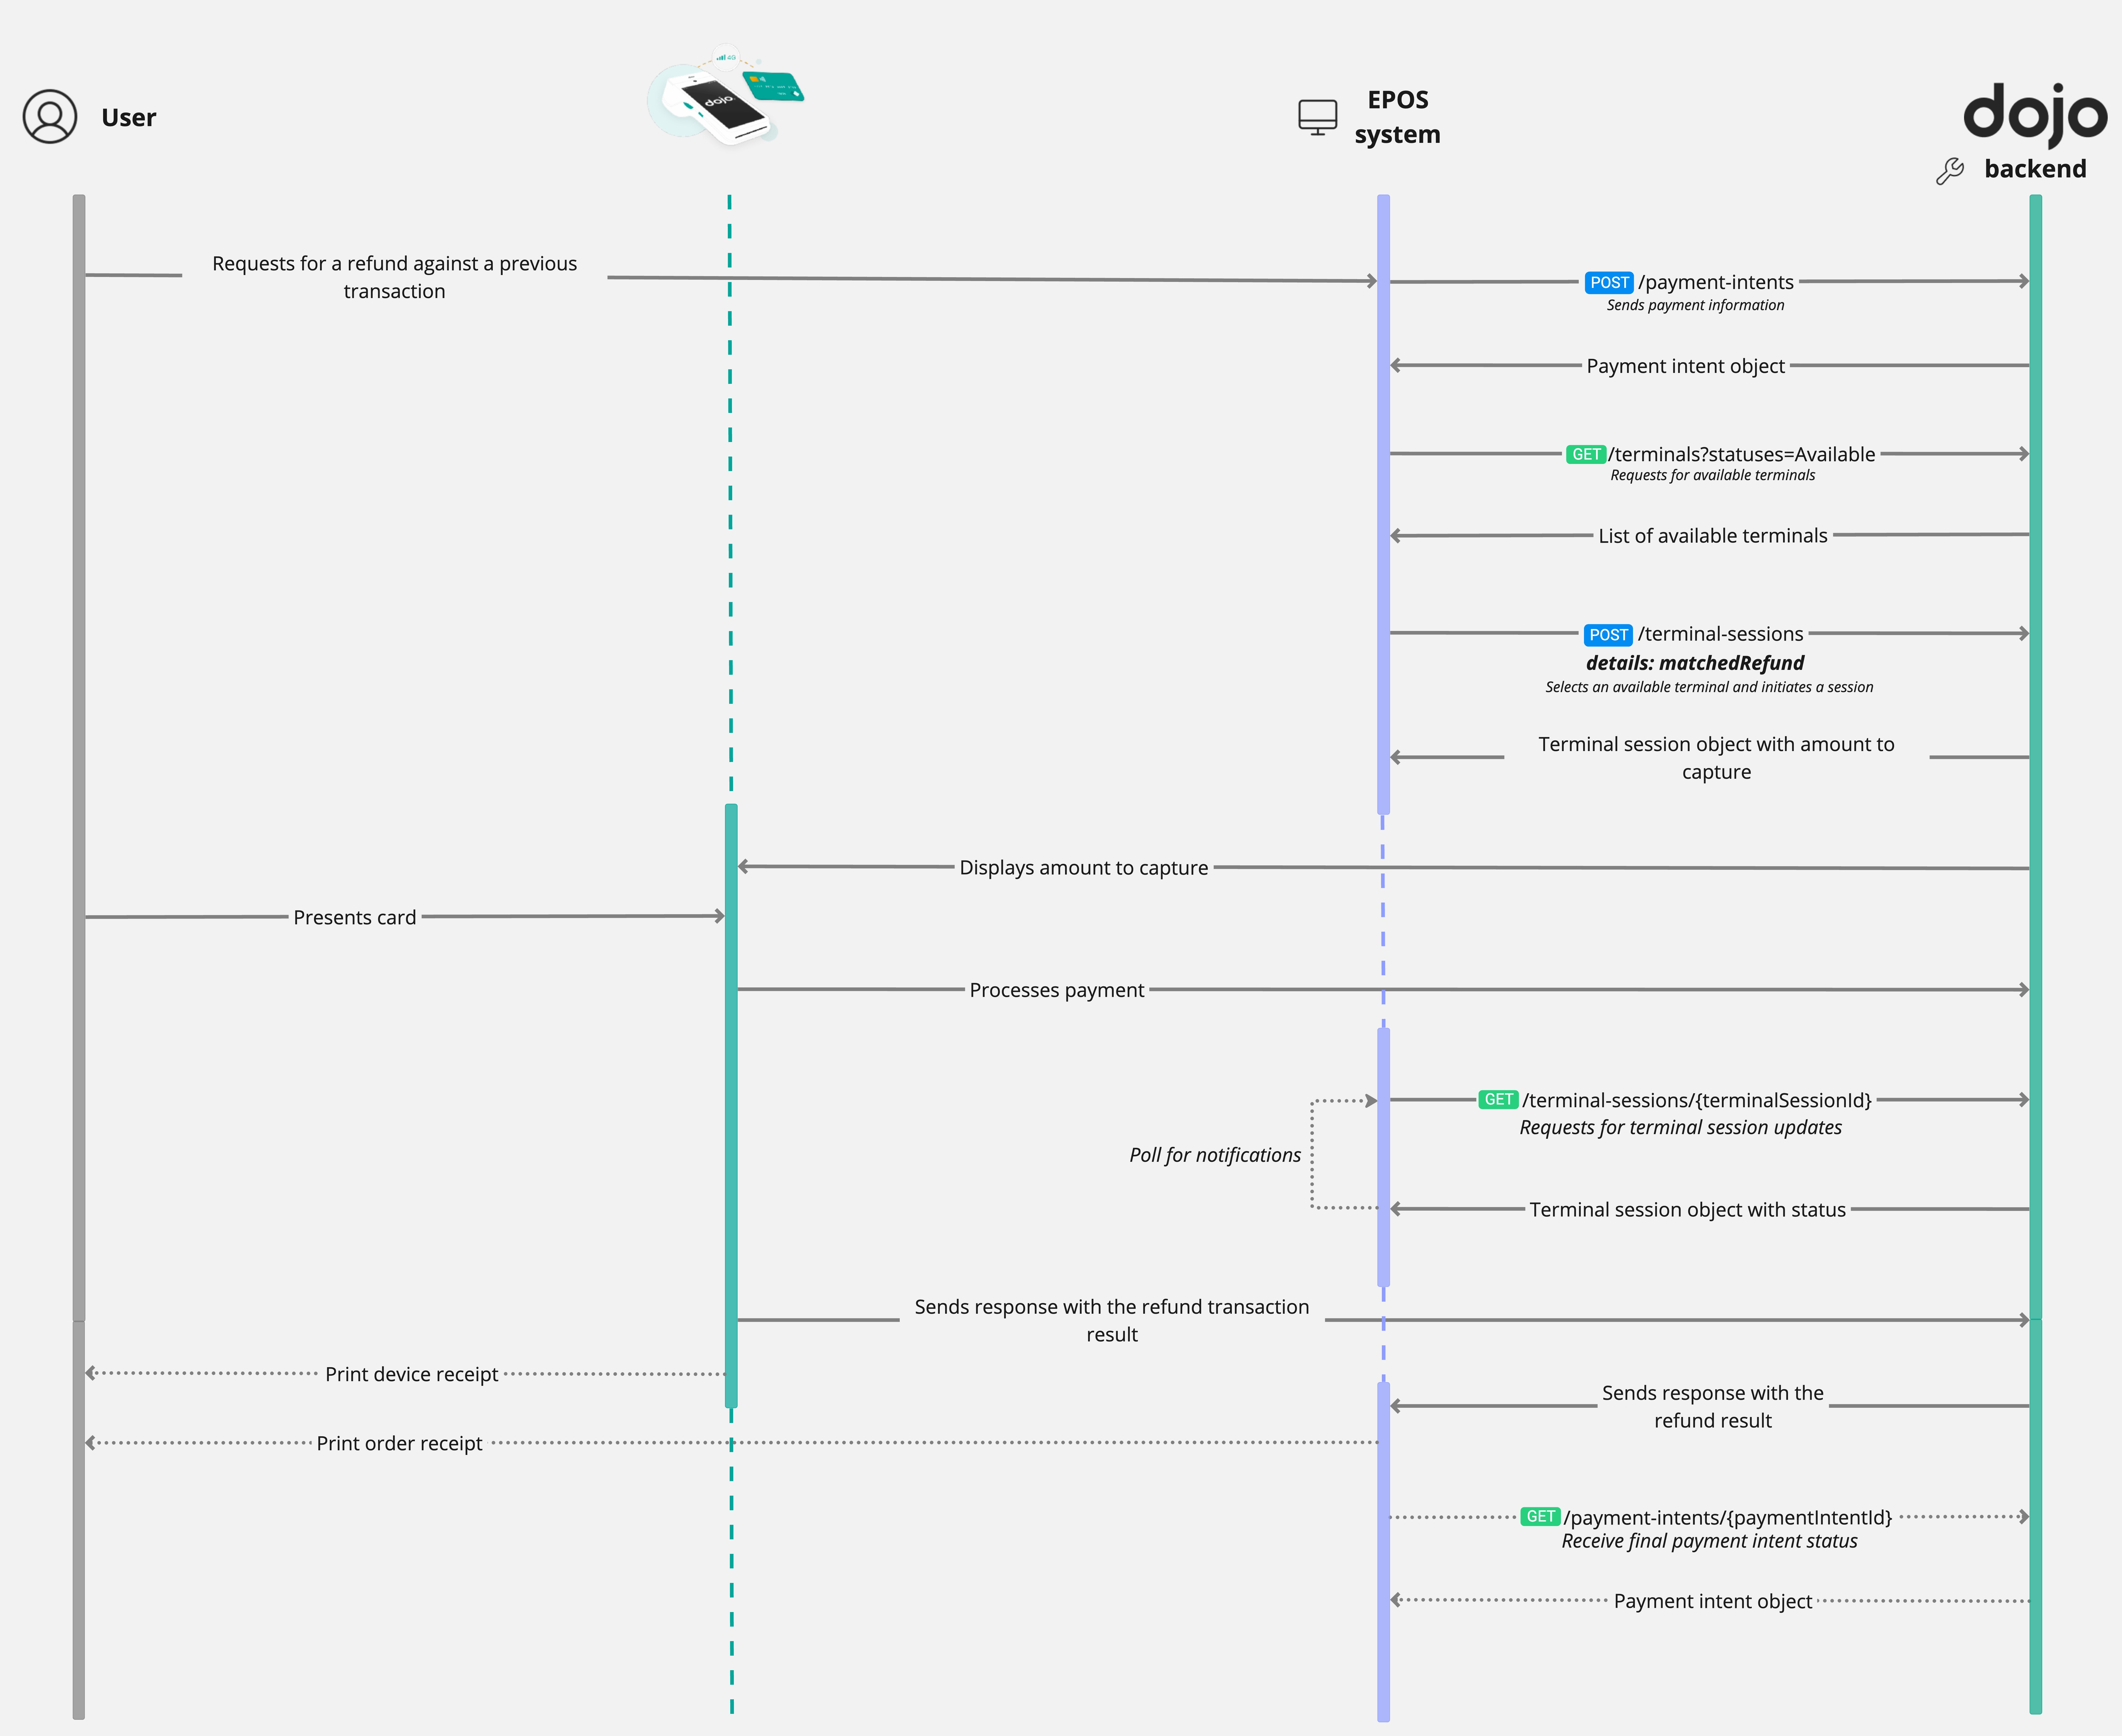
Depending upon the sessionType you choose, perform the following steps for a successful terminal session:
- Sale
- Matched refund


An unlinkedRefund refund session type contains no reference to a payment intent and can allow any amount to be refunded directly from the EPOS systems.
Step 1. Create a payment intent
First, make sure you've already created a payment intent. Visit the payment intents documentation for more information about configuration options. This is where important information like payment details, amount, and currency are stored.
Step 2: Check which terminals are available
GET /terminals
Main page: Retrieve all terminals
You can check which terminals are available by requesting a list of all terminals, or by requesting a filtered list of Available terminals.
Step 3: Create a terminal session
POST /terminal-sessions
Main page: Create session
Over the course of a single business day, a terminal might be associated with hundreds of sessions.
In your request, determine the terminal sessionType. Make sure you've already created your
payment intent before creating a terminal session. You will have to specify the paymentIntentId in the request for Sale and MatchedRefund sessions.
Dojo will initiate the payment intent automatically once you've linked them.
A session will end once the payment is complete, or once the refund has been fully processed.
(Optional) Step 4: Cancel a terminal session
PUT /terminal-sessions/{terminalSessionId}/cancel
curl --location --request PUT 'https://api.dojo.tech/master/terminal-sessions/ts_sandbox_65af01524a36e6a14356dbc0/cancel
Main page: Cancel session
You can cancel a terminal session as long as no card has been presented, inserted or swiped. If payment has been attempted or completed on a terminal session, it will no longer be possible to cancel it.
(Optional) Step 5: Respond to a signature verification request
PUT /terminal-sessions/{terminalSessionId}/signature
Main page: Signature verification
You'll only need to complete this step if the terminal session status changes to SignatureVerificationRequired.
Respond to a signature verification request with true (to accept it) or false (to decline it). If you accept signature verification and send a request with the
accepted field set to true, you will receive a detailed response object including both a customerReceipt and a merchantReceipt.
Step 6: Retrieve the original payment intent
Now that the customer has completed the payment on the terminal and the terminal has reached a final state, retrieve the original payment intent to ensure that the payment is complete.
GET /payment-intents/{paymentIntentId}